- Click on the tab «Invoices» and click on the button «Create Invoice»

- Now select the desired project of the invoice from the list, and click on «Add»

- Here on the overview site you can set and select the invoice number, VAT rate, invoice date, discount, PO number, payment conditions, the sender and recipient of the invoice
Select Invoice Layout
- Under Template you can choose your template for the layout of the invoice
Manually add activities or projects to the invoice
- Under the title «New invoice» or «Invoice» you can change the tab and manually add activities or expense allowances to the invoice. You can also add other projects to the bill with the «Add Project» button
- After you have entered the informations save the invoice by clicking «Save»
Download, edit and delete the Invoice
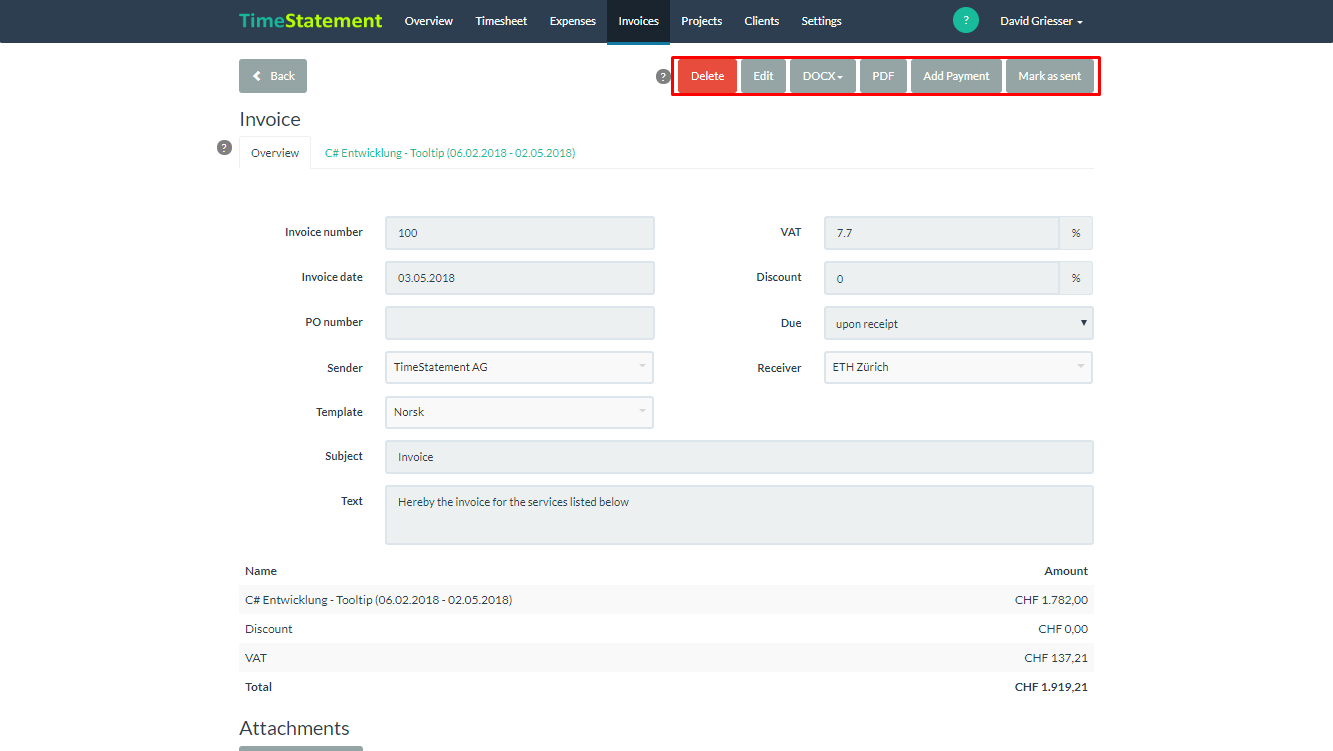
- The invoice now has been generated on TimeStatement, and can be further processed with the following buttons

- To delete the invoice click «Delete»
- If you want to change information of the invoice click «Edit»
- When the entries are all correct, you can still adjust the invoice layout in TimeStatement by clicking «DOXC»
- Download the invoice as a PDF by clicking «PDF» and send it to your customer
- After you have sent the invoice, you can make the invoice ready for payment by clicking on «Mark as Sent»
Enter payment directly
- With clicking the button «Add Payment» you can enter the payment directly

Watch a tutorial video on how to create an invoice:

Comments
0 comments
Please sign in to leave a comment.